cabinets-to-ceiling
Cabinets to the Ceiling: NKBA Math, DIY Methods, and Real Cost Bands
For most kitchens, running cabinets to the ceiling is worth it: you gain real storage, the room reads taller, and there is no dusty gap collecting grease overhead. The tradeoff is cost and reach. Custom or semi-custom height adjustments and possible soffit removal add labor, and the top shelves may need a step stool. The right call depends on your ceiling height, budget, and how often you actually use what’s stored up high.
TL;DR:
Full-height cabinets add significant storage for rarely used items but may require removing soffits and increase overall project costs.
Using fillers or crown molding to close the gap above cabinets offers a similar visual effect at a lower price, suitable for budgets without major renovations.
On 8-foot ceilings, 42-inch upper cabinets typically leave a small gap that can be easily filled with panels or molding, avoiding the need for custom height.
Taller cabinets are most practical when remodeling entirely or redoing the kitchen, but less so if you have large items that need to stay within easy reach.
Proper planning and secure anchoring are essential, especially when adding extensions or removing soffits, to ensure safety and long-term durability.
Solutionteamremodelingsolutionteamremodeling.comPlan A Kitchen That Works BetterSolution Team Remodeling helps Redmond homeowners plan thoughtful kitchen updates with skilled craftsmanship, premium materials, and clear communication.Explore kitchen remodeling
Table of Contents
Pros and cons of running cabinets to the ceiling
Design approaches: full height, soffits, boxes, and alternatives
Planning cabinet heights: 36 inch versus 42 inch uppers
Step-by-step methods to extend existing cabinets
Cost ranges, budget drivers, and getting accurate quotes
Choosing cabinets and finishes for a floor-to-ceiling look
Making tall cabinets usable day to day
Deciding if full height is right for your kitchen
How Solution Team Remodeling can help with your cabinet project
Sources
FAQ
Pros and cons of running cabinets to the ceiling
Extra height means extra storage. A kitchen with 8 or 9 foot ceilings can gain a full extra shelf row for platters, seasonal appliances, or bulk pantry goods that would otherwise crowd your counters. That vertical run also makes a room feel taller and more finished, since there’s no awkward gap where dust and cooking grease used to settle.
The downside shows up in the budget and in daily use. Full-height cabinetry, especially when it requires removing a soffit, costs more than stopping short and leaving a decorative gap. The top shelves also become genuinely hard to reach without a stool, which matters if you’re storing anything you use weekly rather than twice a year.
Storage: Adds usable cubic footage for rarely used items like holiday dishes or the stand mixer.
Look: Eliminates the dust-catching gap and makes standard ceilings feel taller.
Cost: Raises the project budget, particularly when a soffit needs removal.
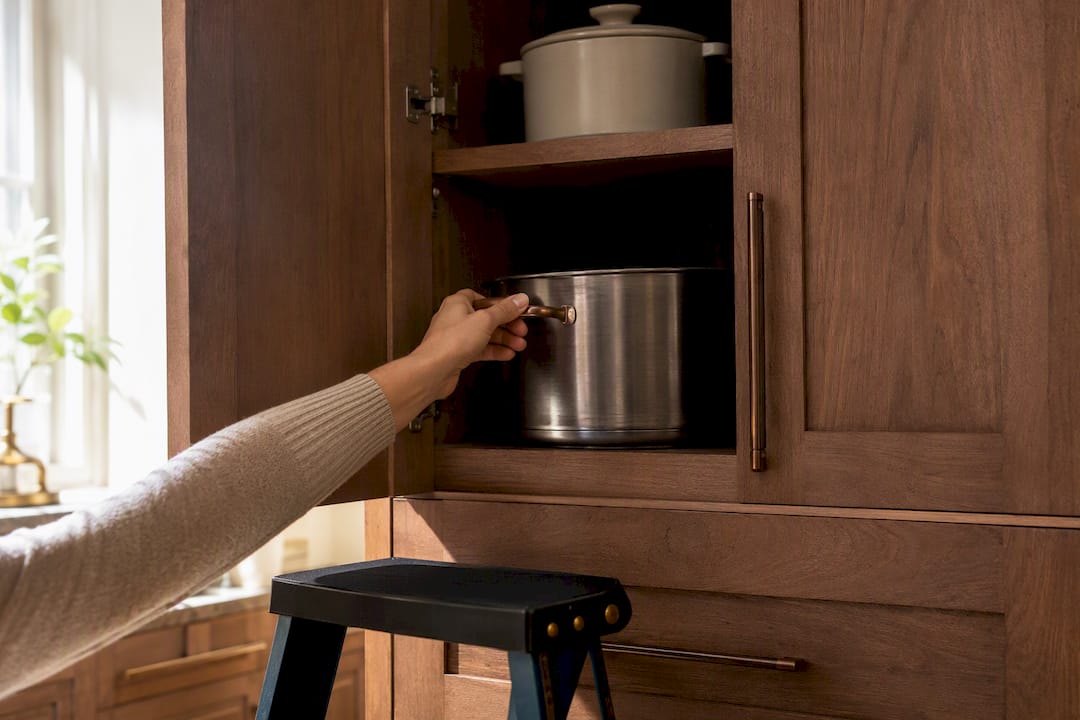
Access: Top shelves need a stool or pull-down hardware for daily-use items.
Pro Tip: If your budget is tight, prioritize height on the cabinet runs you use least, like a pantry wall, and leave frequently used runs shorter.
The cons tend to outweigh the pros when money is limited or when a household relies on tall items, like large stockpots or cereal boxes, that need to stay within easy reach rather than a foot above eye level.
Design approaches: full height, soffits, boxes, and alternatives
There isn’t one correct way to close the gap above your cabinets. Four routes cover most kitchens, and the right one depends on what’s hiding above your existing cabinets.
Full-height cabinetry: New or replacement uppers built to run from countertop to ceiling in one piece. This suits a full remodel or new construction where cabinet order can match the actual ceiling height.
Soffit removal: Demolishing the boxed-in section above older cabinets to expose the true ceiling line. It can hide electrical, ductwork, or framing, so this is usually a job for a licensed contractor rather than a weekend project.
Boxed extensions or added uppers: Building a simple box or stacking a second short cabinet on top of the existing one. This is the lower-cost route when you want the look without a full cabinet swap.
Open shelving or crown molding: Adding shelves or a substantial molding profile to visually bridge the gap without extending the cabinet boxes themselves.
A ceiling beam, a recessed light run, or ductwork routed through a soffit can rule out full removal and push you toward a boxed extension instead. Kitchens with these obstacles often end up with a hybrid: molding on one wall, a shallow box on another. Before choosing, it helps to know what’s actually behind the drywall, which is where a drywall ceiling repair guide is useful for understanding what patching and finishing looks like once framing or ductwork gets exposed.
Planning cabinet heights: 36 inch versus 42 inch uppers
The math starts with your ceiling height and works backward. Add your base cabinet height (typically 34.5 inches), the countertop and backsplash allowance (roughly 4 to 5 inches with a standard countertop), and your upper cabinet height, then compare the total to your ceiling.
8 foot ceiling (96 inches): Standard 36 inch uppers plus base and countertop clearances leave a noticeable gap, which is why 42 inch uppers are common here.
9 foot ceiling (108 inches): 36 inch uppers plus base and backsplash still leave room for crown molding or a filler panel rather than a second cabinet stack.
Filler panels: A thin filler strip between the top of the cabinet and the ceiling absorbs small irregularities in a ceiling that isn’t perfectly level.
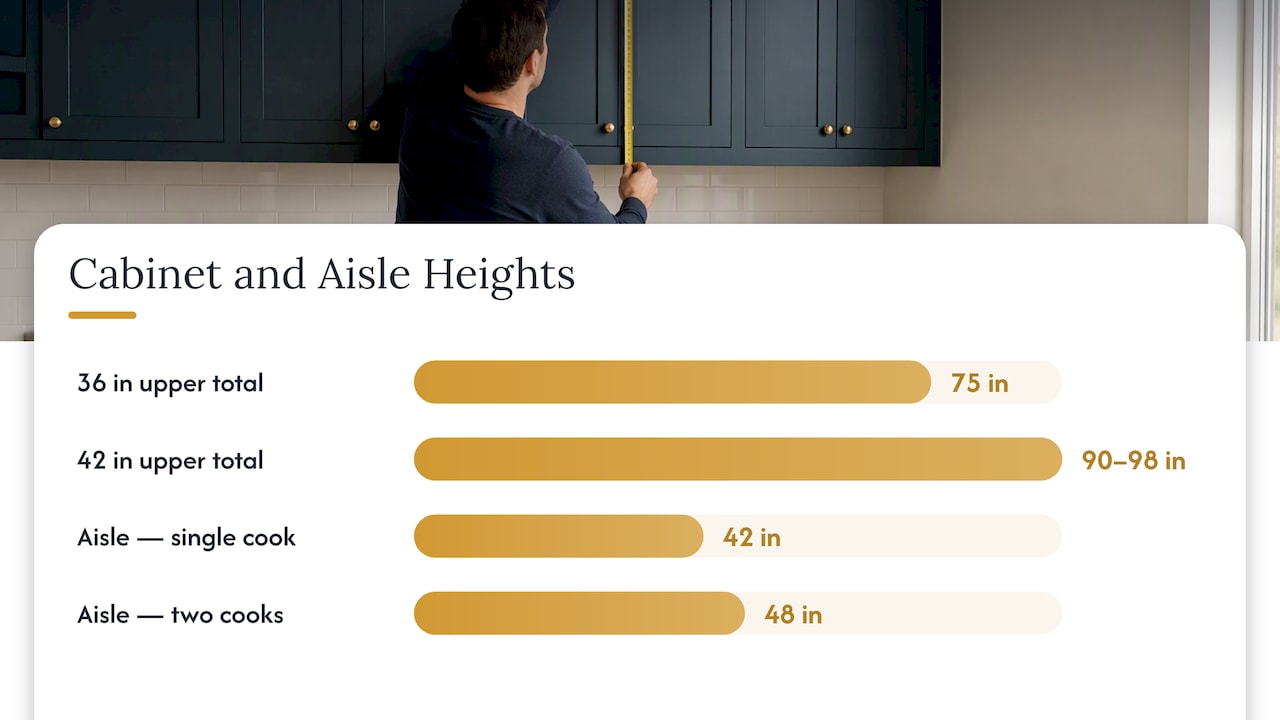
On an 8 foot ceiling, 42-inch uppers paired with standard 36-inch base cabinets and typical countertop clearance commonly total around 90 to 98 inches, which still leaves room to plan for a filler panel rather than a flush fit. That gap is normal, not a measuring error, and a filler panel or thin crown strip is the standard fix.
Height math matters less than clearance once cabinets are in place. The NKBA Kitchen Planning Guidelines recommend at least 42 inches of aisle width for a single cook and 48 inches where two people work at once, a number worth checking before adding depth to any cabinet run, upper or lower.
Step-by-step methods to extend existing cabinets
Before picking up a tool, measure your actual ceiling height at both ends of the run (ceilings are rarely perfectly level) and check above the existing cabinets for ductwork, electrical boxes, or a structural beam. Any of those can change which method works.
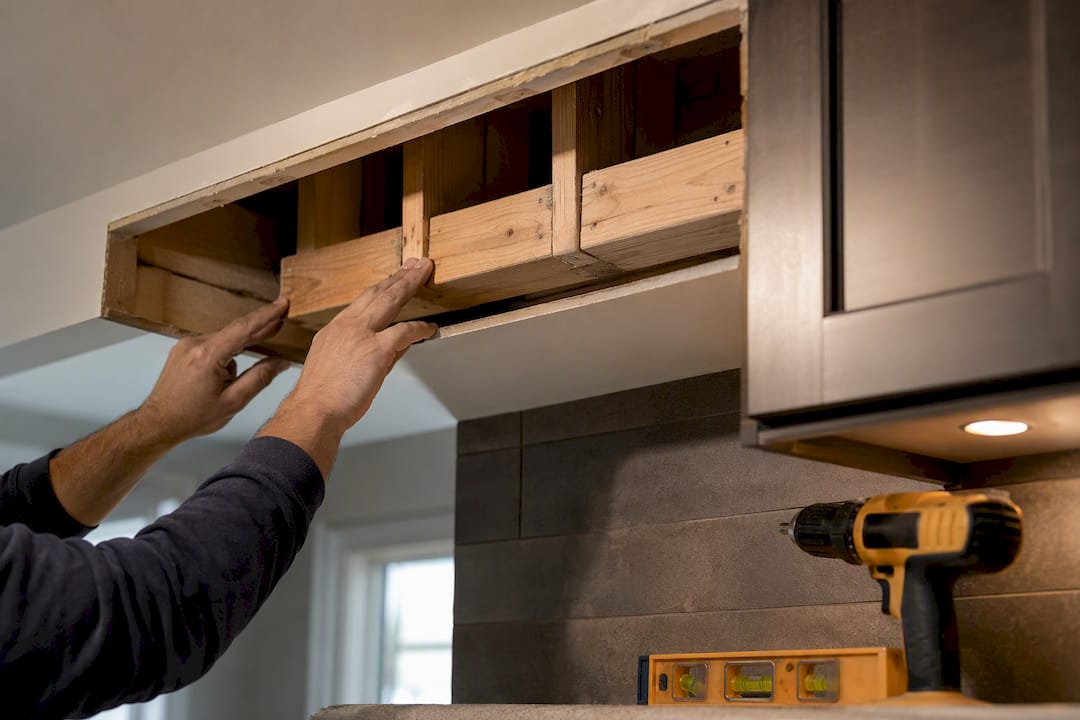
Build and attach an extension box. Construct a simple open-face box sized to fill the gap, screw it into wall studs or new blocking above the cabinet, then finish the seam with crown molding. This is the most common DIY route for kitchens without hidden obstructions.
Install filler panels or a shallow boxed top. When a soffit can’t come out, a thin filler panel or a shallow finished box closes the gap without touching the ceiling structure. It’s the fastest fix when a full soffit removal isn’t in the budget.
Swap to taller uppers. Replacing existing cabinets with 42 inch or custom-height units gets you a true built-in look, though it may mean adjusting a range hood, microwave shelf, or other fixture that was sized to the old cabinet height.
Pro Tip: Always secure new blocking into wall studs before hanging any extension, since drywall alone won’t hold the weight of a loaded cabinet box.
Anchoring is the part DIYers most often underestimate. A wall-hung extension carrying dishes or small appliances needs to tie into structural blocking, not just drywall anchors. If you find ductwork, wiring, or a load-bearing element once the soffit is opened, that’s the point to call a licensed contractor rather than improvise a fix.
Cost ranges, budget drivers, and getting accurate quotes
Cabinet quality is the biggest single cost driver: stock boxes cost far less than semi-custom or fully custom units built to an exact ceiling height. Labor is the second driver, and it climbs fast once soffit removal is involved, since that work often uncovers wiring or ductwork that needs rerouting before drywall can go back up.
Budget route: Stock cabinet extension box with crown molding, no soffit work.
Mid-tier route: Semi-custom uppers sized to the ceiling with filler panels and matched finish.
Full custom route: Built-to-ceiling cabinetry with soffit removal, drywall repair, and integrated lighting.
Hidden cost risk: Electrical relocation, ductwork rerouting, and drywall patching can add unplanned line items to any of the three routes.
When comparing quotes, ask each contractor whether the price includes drywall repair after soffit work, whether cabinet hardware and crown molding are included or itemized separately, and whether the quote assumes any electrical or HVAC work sight unseen. A number that looks low on paper often excludes exactly those items.
Choosing cabinets and finishes for a floor-to-ceiling look
Stock cabinets are the cheapest way to get a full-height run, but sizing is limited to a handful of standard heights, so you’ll likely need a filler panel or molding to close the final gap. Semi-custom lines offer more height options and better fit; fully custom cabinetry is built to your exact ceiling measurement but costs the most.
Crown molding profile: A taller, more detailed profile reads as more finished and can visually add height even on a standard 8 foot ceiling.
Finish matching: Painted finishes are easier to match across added boxes or fillers than stained wood, where grain and tone can vary between batches.
Ventilation clearance: Any cabinet run near a range hood needs clearance that matches the appliance manufacturer’s spec, not just visual balance.
Glazing near heat sources: Glass cabinet fronts near a cooktop should use tempered glass per standard safety practice.
Making tall cabinets usable day to day
The top shelf of a floor-to-ceiling run should hold things you touch a few times a year: holiday serveware, the turkey roaster, luggage-sized appliance boxes. Anything used weekly belongs at eye level or below, no matter how much space opens up overhead.
Pull-down shelves and pull-out racks bring high storage within reach without a stool for most items.
Lazy susans and vertical dividers make corner and narrow cabinets easier to use at any height.
A slim, dedicated step stool stored inside a lower cabinet or pantry keeps the top shelves practical without cluttering the floor.
Pro Tip: Label bins on the top shelf and do a seasonal check twice a year so rarely used storage doesn’t become forgotten storage.
Deciding if full height is right for your kitchen
Full-height cabinets earn their cost when you genuinely need the storage and you’re already redoing the kitchen, since the marginal cost of building taller drops once cabinets are being replaced anyway. If your existing cabinets are otherwise fine, a boxed extension or open shelving gets you most of the visual benefit for a fraction of the price.
Ask yourself three things before committing: Do I have items to fill the top shelf, or would it sit empty? Is my ceiling clean, or does a soffit likely hide ductwork? Can my budget absorb a surprise once that soffit comes down? If the answer to any of those gives you pause, start with molding or a shallow box and revisit full height during a later remodel.
— Vlad
How Solution Team Remodeling can help with your cabinet project
Professional cabinet-to-ceiling projects are best approached by measuring first, planning around what’s actually behind your soffit, and pricing the work honestly before anything gets torn out. Using premium materials and clear communication through each stage, from initial measurements to the final crown molding, can ensure quality results.

A typical project starts with an on-site assessment of ceiling height, existing cabinet condition, and any suspected wiring or ductwork, followed by a straightforward quote without pressure to increase the project scope. If you’re weighing a boxed extension against a full custom build, request a consultation to get a plan and a price built around your actual kitchen.
Sources
For measurement and clearance standards, the NKBA Kitchen & Bath Planning Guidelines cover access standards used across the industry. Homeowners tackling soffit removal on their own should read a drywall repair guide before opening any ceiling section, and those planning trim work can see examples on the trim installation page.
Kitchen & Bath Planning Guidelines (NKBA) — 2023 DC Guidelines
FAQ
What are cabinets that go to the ceiling called?
They’re usually called full-height or floor-to-ceiling cabinets, though “ceiling height cabinets” is also common in cabinet catalogs. Some suppliers label the tallest stock option as 42 inch uppers, distinct from the shorter 36 inch standard.
Should your cabinets go to the ceiling?
It depends on your storage needs, ceiling height, and budget: full height adds real storage and a cleaner look, but costs more and can make top shelves hard to reach. A boxed extension or crown molding gets a similar visual effect for less money if a full rebuild isn’t in the budget.
How do you make existing cabinets go to the ceiling?
The most common DIY approach is building a simple extension box, securing it to blocking anchored in wall studs, and finishing the seam with crown molding. When a soffit is in the way, removing it exposes the true ceiling but can uncover wiring or ductwork, which is a good reason to bring in a licensed contractor.
How far should cabinets be from the ceiling?
Ideally there’s no visible gap: cabinets either run flush to the ceiling or stop short enough to leave room for a deliberate crown molding or filler panel. An awkward few-inch gap with no trim is the look most homeowners are trying to avoid when they extend cabinets upward.
Recommended
Back to Blog
