shower-niche-height
Homeowners: Set Shower Niche Height 36–48 in with Pro Waterproofing Steps
A shower niche works best centered around 48 inches from the finished shower floor, with a comfortable range of 36 to 48 inches depending on who uses the shower. That spread matters because it keeps bottles and soap within easy reach without forcing anyone to stretch or bend. Below, we cover how to adjust for height, layout, and waterproofing before you cut into tile or backerboard.
TL;DR:
The ideal niche height depends on user stature, ranging from 36 inches for children or seated users to 48 inches for tall adults, measured from the finished floor.
Position the niche on the side most used or at a height that matches the natural reach of household members for daily convenience.
Niche size and orientation should match storage needs, with vertical suited for tall bottles and horizontal good for grouping items; depth should accommodate common bottles without pooling water.
Proper installation requires anchoring the niche between studs, waterproofing with manufacturer guidance, and adding a slope to the shelf to prevent water pooling.
Avoid common mistakes such as under-sizing, poor height placement, skipping waterproofing, or cutting into plumbing and wiring without checking clearances first.
Solutionteamremodelingsolutionteamremodeling.comPlan A More Functional BathroomSolution Team Remodeling helps Redmond homeowners create thoughtful bathroom layouts with skilled craftsmanship, premium materials, and organized execution.Explore bathroom remodeling
Table of Contents
Where the standard height numbers come from
Choosing placement by who uses the shower
Niche size, shape, and layout: vertical vs. horizontal
Installation and waterproofing essentials
Common mistakes and how to avoid them
Practical measuring and planning checklist
How a remodeling crew handles niche placement on-site
Professional help for planning and installing your shower niche
FAQ
Sources
Where the standard height numbers come from
The figure that shows up in most bathroom plans is not arbitrary, typically around the ergonomic reach range recommended by accessibility guidelines. It puts the center of the niche at roughly chest height for an average standing adult, which keeps shampoo bottles and razors within a natural arm swing instead of a reach. Many designers settle on a working range of 36 to 48 inches, and some shift to 42 inches when the household skews shorter or when the niche sits inside a shower with a bench.
Height is always measured from the finished shower floor, not the subfloor or the curb. That distinction matters because tile thickness, mortar bed slope, and threshold height can shift the usable interior by half an inch or more, which is enough to throw off a niche that was framed before the finish floor was set.
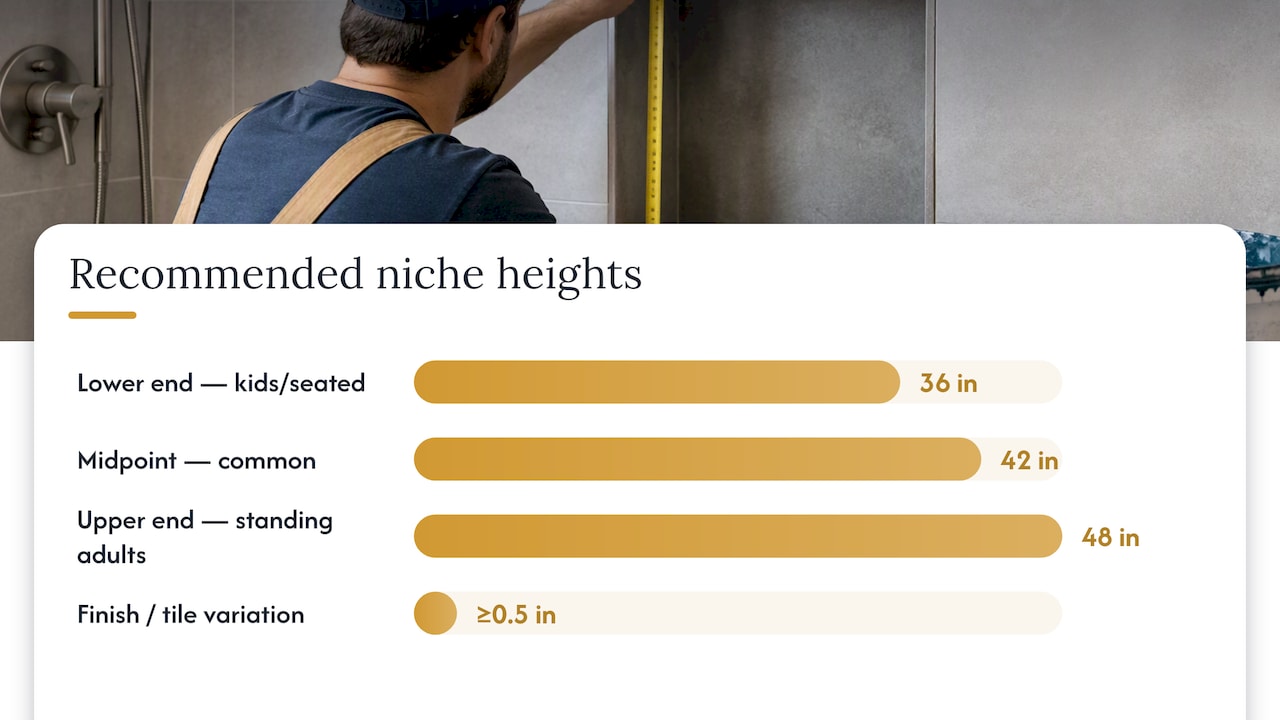
Accessibility guidance offers a useful outside check on these numbers, even on a remodel with no accessibility requirement. The Operable Parts guidance from the Access Board sets the unobstructed forward and side reach range starting from about 15 inches up to 48 inches, with a maximum reach depth of 10 inches, and a reduced maximum of 46 inches for a high reach over an obstruction. That ceiling aligns closely with the common rule of thumb, which is not a coincidence: both come from average adult arm ergonomics.
Each height in the typical range favors a different use case:
36 inches suits children, seated users, or anyone who wants items within easy reach without raising an arm.
42 inches works as a middle ground in households with a mix of adult heights.
48 inches favors standing adults who want the niche at chest-to-eye level for a clean sightline.
None of these numbers are fixed rules. They are starting points you adjust once you know who actually uses the shower.
Choosing placement by who uses the shower
The right height depends less on a chart and more on the people standing under the water every day. A single adult living alone can place the niche wherever suits their own reach. A family bathroom needs a compromise, and sometimes a second niche.
For a household with a very tall adult, shifting the niche toward 48 to 52 inches keeps items at a comfortable chest level instead of forcing a stoop. For a household of shorter adults or a bathroom used mainly by children, dropping to 36 to 42 inches avoids the stretch entirely. Neither choice is wrong; it is a matter of matching the niche to the people who will reach into it hundreds of times a year.
Seated or mobility-limited users need a different approach altogether. A niche set around knee-to-thigh height, reachable from a shower seat or bench, works better than one positioned for a standing adult. In many cases, the cleanest solution is a second, lower niche rather than compromising the primary one.
Dominant hand and shower layout matter too. A niche placed on the side you reach toward most often, rather than centered purely for symmetry, saves an awkward twist every time you shower. In a shared bathroom with very different needs among users, two staggered niches, one higher and one lower, often beat trying to force a single height to serve everyone.
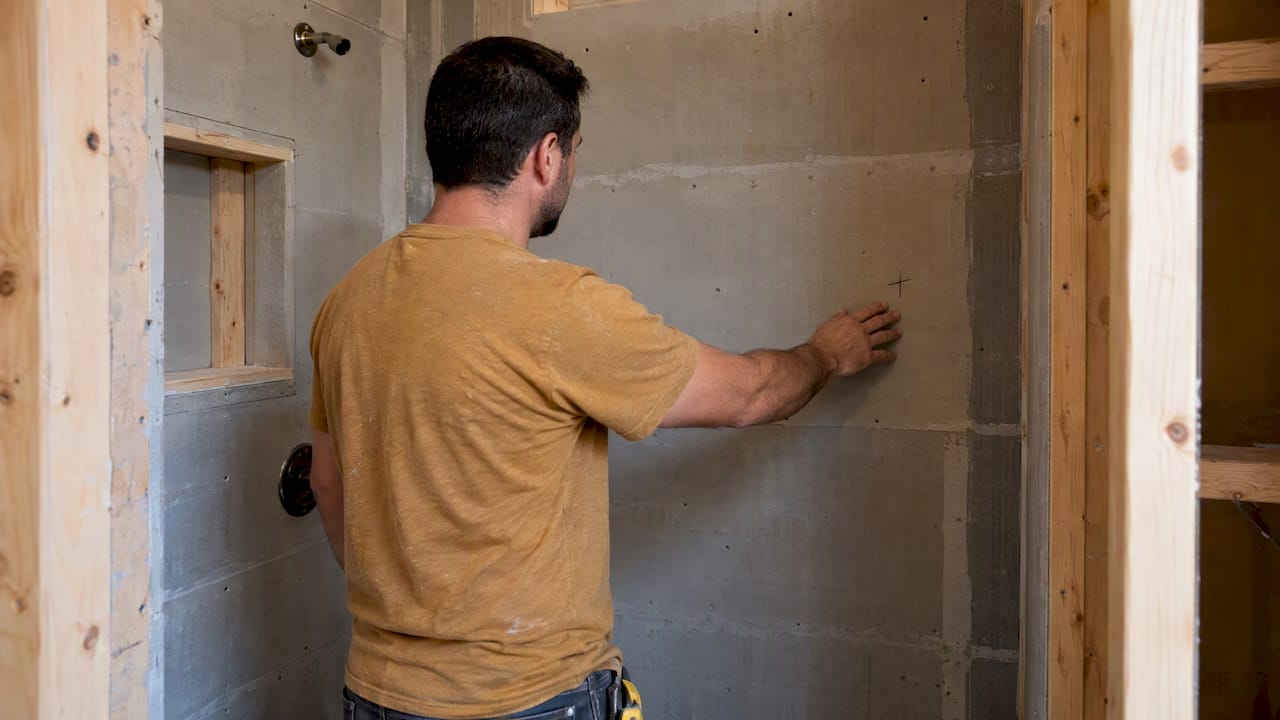
Pro Tip: Stand in the shower stall before tile goes up and mark where your hand naturally lands at rest; that mark is a better height reference than any chart.
Niche size, shape, and layout: vertical vs. horizontal
Once height is settled, size and orientation shape how useful the niche actually is day to day. Prefabricated niches typically run from small single-shelf boxes up to larger multi-shelf units, and the Schluter®-KERDI-BOARD-SN line, for example, comes in sizes from 12 inches by 6 inches up to 12 inches by 28 inches, which covers most single and double-shelf needs without a custom build.
Depth matters as much as the opening size. A depth of 3.5 to 4 inches handles standard shampoo and conditioner bottles, while anything up to 6 inches accommodates larger pump bottles or body wash tubs. Going deeper without planning for slope invites pooling at the back of the shelf, since water has farther to travel before it drains back toward the shower floor.
Orientation changes what the niche is good at:
Vertical niches suit tall bottles, a single soap dispenser, or a narrow decorative display.
Horizontal niches fit better for grouping several bottles side by side or for framing with a band of accent tile.
Multi-shelf units combine both, separating bulk storage from smaller daily items.
Tile size and grout lines affect how the finished niche reads visually. A niche sized to align with full tiles, rather than cutting awkward slivers at the edges, looks intentional instead of patched in. Planning the opening dimensions around your tile layout before cutting avoids a lopsided border that is hard to fix after the fact.
Installation and waterproofing essentials
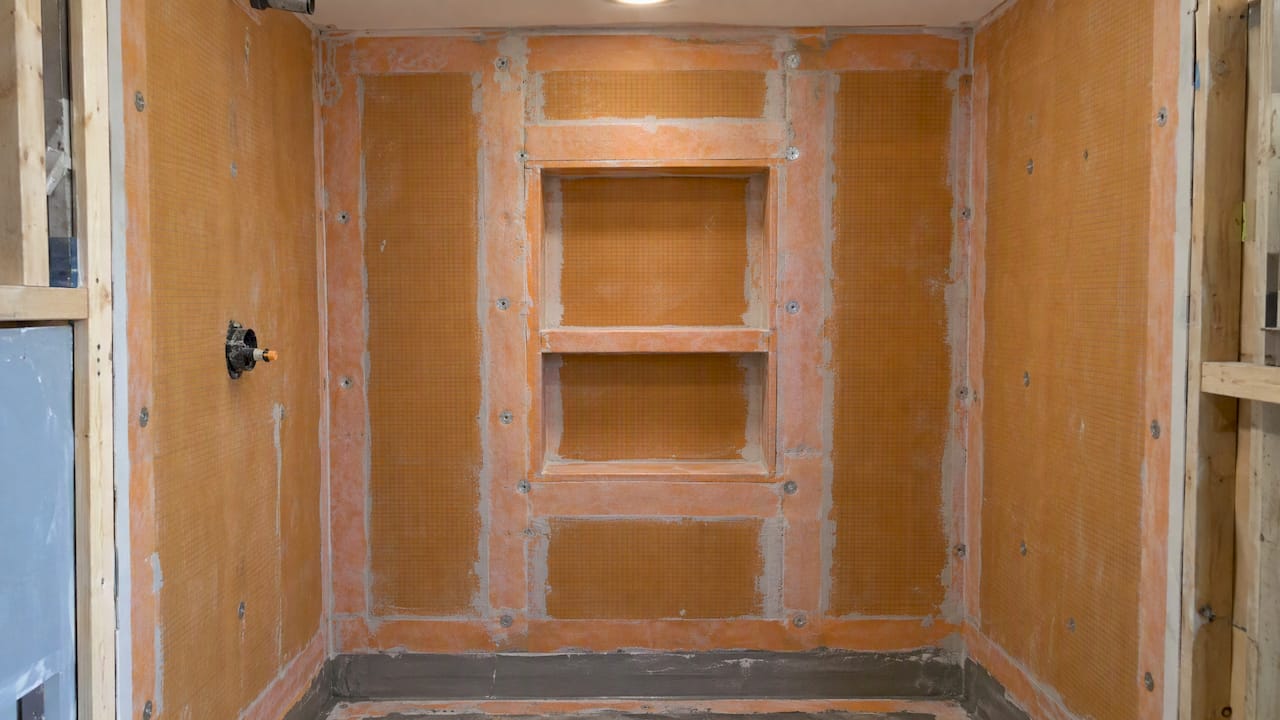
Placement on paper means little if the installation behind the tile fails. The first decision is structural: locating the niche so it falls between studs, ideally supported on both sides by framing rather than floating in open cavity space.
For prefabricated units like the Schluter KERDI-BOARD-SN, manufacturer guidance lays out a fairly fixed sequence:
Trace the niche flange onto the wall and cut the opening so the unit is supported by framing on both sides.
Insert the niche and fasten it to the studs, keeping fastener spacing to roughly 12 inches on center near the flange for secure support.
Bond the flange and seams with thin-set, embedding KERDI waterproofing membrane or the unit’s pre-cut KERDI-BAND frame over every transition.
Mark a level line for the surrounding tile, then bed the prefabricated shelf in thin-set, setting a slight slope toward the front or raising the back edge so water runs out rather than pooling.
That slope step is easy to skip and hard to fix later. A flat or back-sloped shelf collects standing water behind bottles, which is exactly the kind of slow, hidden moisture that leads to grout failure and mold months after the tile looks finished.
Fastener spacing and flange bonding are not places to improvise. The KERDI-BOARD-SN installation guidance specifies both the stud attachment method and the membrane steps for a reason: a niche is one of the few spots in a shower where the waterproofing layer gets physically interrupted, so every seam needs deliberate treatment rather than a quick bead of sealant.
Common mistakes and how to avoid them
Most niche problems trace back to decisions made before a single tile goes up. A few recurring mistakes show up across remodels:
Sizing too small or too shallow. Measure your tallest bottle, add an inch, and use that as your minimum interior depth rather than guessing.
Setting the wrong height for the people who actually shower there. A height borrowed from a magazine photo rarely matches your own household’s reach.
Skipping or shortcutting waterproofing. Following the membrane and slope steps from the manufacturer prevents the leaks and mold that show up long after installation.
Cutting into plumbing, wiring, or a 2x4 wall without checking first. A standard 2x4 wall leaves limited depth once backerboard and tile are added, so confirm clearance before committing to a deeper prefab unit.
Each of these is cheap to fix on paper and expensive to fix once tile is set, which is the real argument for slowing down at the planning stage.
Practical measuring and planning checklist
Before anyone picks up a saw, working through a short sequence on-site prevents most surprises:
Measure from the finished shower floor to your target height, then mark the center and both edges of the opening.
Measure your tallest intended bottle to confirm the niche depth and shelf spacing will actually fit it.
Scan the wall for studs, pipes, and wiring, and check framing or plumbing plans if they exist.
Choose a prefab size or frame a custom opening, accounting for backerboard and tile thickness eating into the interior space.
Snap a level line for the tile and shelf, mark fastener locations, and note where waterproofing membrane transitions will land.
Confirm the slope direction for the shelf before setting it, and sequence waterproofing ahead of any finish tile work.
Pro Tip: Tape a cardboard mockup of the niche opening to the wall before cutting; standing in the shower with it in place catches sizing problems a tape measure alone can miss.
How a remodeling crew handles niche placement on-site
In consultations, we start by asking who actually uses the shower, not just what looks good in a photo, since that single question drives most of the height and layout decisions that follow. On real walls, framing rarely cooperates perfectly with a design plan, so a niche sometimes shifts a few inches to land on solid studs rather than forcing a cut through open cavity space.
Families with children often end up with two niches at different heights instead of one compromise height, and a shelf that needs a slope gets tiled with that slope built in before grout goes down, not adjusted after the fact. Examples of finished work like this are in our renovation portfolio.
— Vlad
Professional help for planning and installing your shower niche
We offer bathroom remodeling and tile installation that covers everything from the first measurement to the final grout line, including waterproofing steps to help keep a niche leak-free for years. Instead of guessing at a height from a blog post, we measure your shower and the people using it before anything gets cut.

Working with a dedicated crew means:
Site measurements that account for your actual studs, plumbing, and tile layout, not generic assumptions.
Waterproofing handled with manufacturer-specified membrane and slope, not improvised sealant.
Reliable scheduling so your bathroom is out of commission for the shortest time possible.
Finished examples you can see in our tile and surface renovation work.
If built-in storage near the shower is part of a larger plan, coordinating niche design with vanity or linen cabinetry from a specialist like Classy Closets can tie the whole room together.
Request a free estimate through our services page and we will walk through height, size, and placement with you before any tile comes off the wall.
FAQ
Is 12 inches tall enough for a shower niche?
A 12-inch-tall niche works for a single row of standard bottles but gets tight if you want to stack items or store taller pump bottles. Many households prefer a slightly taller opening or a second shelf for more flexibility, and prefabricated units come in several height options to match.
What are common shower niche mistakes?
The most frequent errors are sizing the niche too small for the bottles you actually own, setting the height without measuring the people who use the shower, and skipping proper membrane and slope waterproofing. Cutting into a stud bay with plumbing or wiring, or into a 2x4 wall without checking clearance, also causes avoidable problems.
Is it better to have shower niches vertical or horizontal?
Neither orientation is universally better since the right choice depends on what you plan to store. Vertical niches suit tall bottles or a single decorative item, while horizontal niches work better for grouping several bottles side by side or framing with an accent tile band.
Can a shower niche go in a 2x4 wall?
A shallow niche can fit in a standard 2x4 wall, but the available depth shrinks once backerboard and tile are added on both sides. Deeper prefabricated units may need a furred-out or 2x6 wall, so checking the manufacturer’s depth specification against your actual wall cavity before cutting is worth the extra few minutes.
How do I maintain a shower niche to prevent mold?
Wipe the shelf dry after each shower and clean grout lines regularly to prevent soap scum and mineral buildup from trapping moisture. A niche with a proper slope, installed per Schluter’s shelf guidance, drains on its own and needs far less maintenance than a flat shelf where water sits.
Sources
Recommended
Back to Blog
