soundproofing-interior-walls
Cut Wall Noise This Weekend: Soundproof Interior Walls for Homeowners
Seal every gap, fill the wall cavity with mineral wool or fiberglass, and add a layer of mass such as new gypsum board or a damping compound: these three moves deliver the biggest, most affordable drop in transmitted sound for most interior walls. If noise still gets through, or if the problem is footsteps and bass rather than voices, you likely need decoupling or a contractor-installed assembly, especially when flanking paths or ductwork are involved.
TL;DR:
Sealing gaps and adding a single gypsum board layer with damping compound can significantly improve soundproofing on interior walls at low cost.
For impact noise or persistent flanking paths, decoupling methods like resilient channels or double-stud walls are more effective but require skilled installation and professional help.
Diagnosing whether noise is airborne or impact is crucial, as sealing and mass properly address airborne issues while impact noise needs isolation solutions.
Soundproofing results are highly dependent on correct assembly, sealing, and workmanship, with each 10-point increase in STC roughly halving perceived loudness.
Common pitfalls include relying on marketing hype of foam panels and neglecting simple sealing, which often provides more noticeable improvements than expensive heavy materials.
SolutionteamremodelingPlan A Quieter, More Functional HomeSolution Team Remodeling brings thoughtful planning, skilled craftsmanship, and organized remodeling for homeowners updating spaces in Redmond.Explore remodeling services
Table of Contents
Is the noise airborne, impact, or flanking through another path?
Low-cost fixes you can do this weekend without removing drywall
What higher-performance retrofits can realistically achieve
What these projects actually cost and how long they take
Should you DIY this or call a contractor?
Notes from the field on staging a soundproofing project
Health and safety steps to take during the work
Why ductwork and vents can undo your soundproofing
What the soundproofing industry gets wrong about quick fixes
How Solution Team Remodeling approaches soundproofing retrofits
FAQ
Sources
Is the noise airborne, impact, or flanking through another path?
Before buying materials, figure out how sound is actually traveling. Airborne noise (talking, television, music) moves through air gaps and vibrates the wall surface. Impact noise (footsteps, dropped objects, plumbing bangs) travels through the structure itself and often needs a completely different fix.
Run a few simple tests before you commit to a project:
Have someone talk or play steady tones on the other side while you walk the wall listening for hot spots, which usually means airborne leaks.
Tap or knock on the wall and the floor above to see if the sound carries through framing rather than air, a sign of impact transmission.
Check doors, HVAC registers, electrical boxes, and the gaps where walls meet the ceiling or floor, since these are the most common flanking paths that let sound sneak around an otherwise solid wall.
Airborne problems respond to sealing, mass, and cavity absorption. Impact problems need isolation and underlayments instead, so matching the diagnosis to the fix saves money and avoids disappointment.
Low-cost fixes you can do this weekend without removing drywall
Most interior walls improve noticeably with sealing and a single added layer, no demolition required. Work in this order:
Caulk every gap with acoustical sealant, especially along the top and bottom plates, around pipe and wire penetrations, and where trim meets drywall.
Install acoustic putty pads inside outlet and switch boxes, and add foam gaskets behind cover plates, since electrical boxes are a direct opening into the cavity.
If outlets sit back-to-back on either side of the wall, consider relocating one box a stud bay over rather than leaving two openings facing each other.
Add one new layer of gypsum board over the existing drywall, staggering the seams and applying a damping compound like green glue between layers for extra isolation.
Swap hollow interior doors for solid-core doors, add a door sweep and perimeter gasket, and use rugs or a loaded bookcase against the wall as a partial sound mask.
Airtightness often matters more than mass alone: a heavy wall with unsealed gaps can perform worse than a lighter wall that’s fully sealed.
Pro Tip: Seal first, test again, then decide if you still need a new gypsum layer. Skipping the sealing step wastes money on every upgrade that follows.
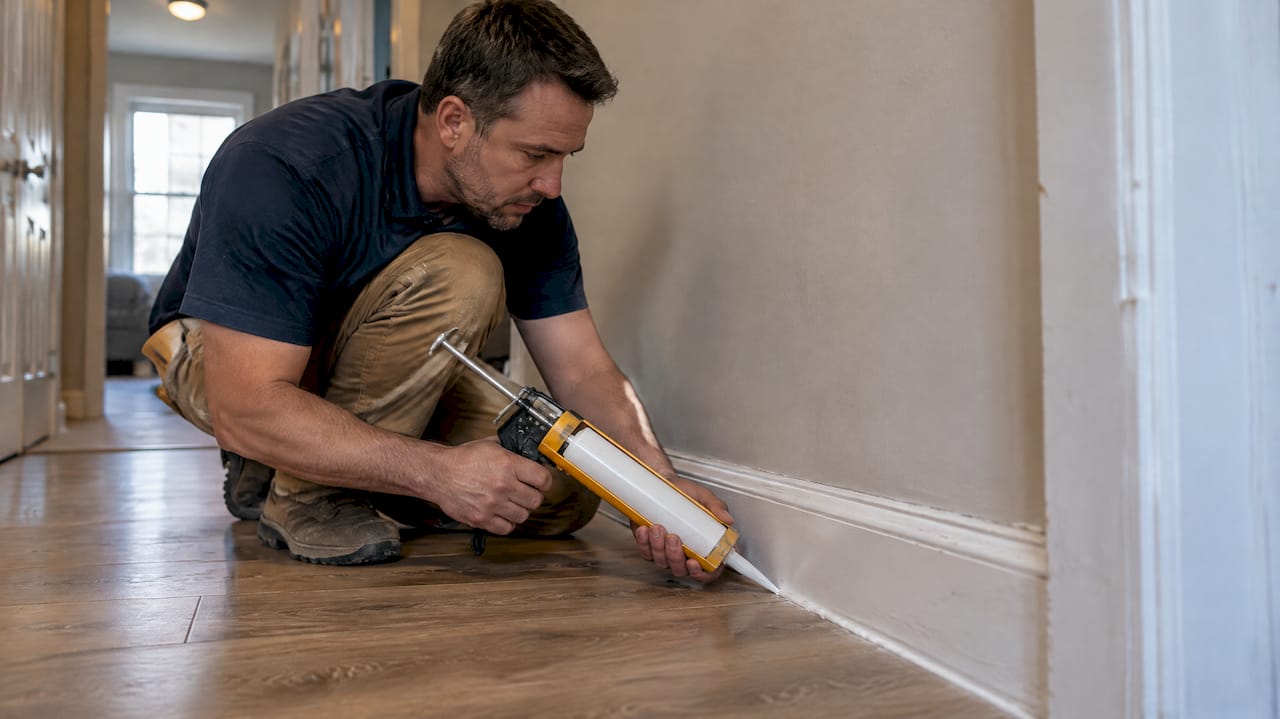
What higher-performance retrofits can realistically achieve
When sealing and a single added layer aren’t enough, the next step is a system that combines mass, absorption, and decoupling. Three common retrofit recipes, in order of cost and disruption:
Double drywall with damping compound: a second gypsum layer with green glue between sheets, moderate cost, no reduction in room size, and a solid STC gain.
Resilient channel or isolation clips plus a new layer: better decoupling because the new drywall no longer touches the framing directly, but it requires skilled installation to avoid screws bridging into the studs.
Double-stud or staggered-stud wall: the most effective option in many retrofits because the two wall faces share no common framing, though it’s also the most invasive and eats into floor space.
Expect roughly these ranges in practice: a basic single wall tests around STC 35 to 39, an insulated wall around 45 to 50, and a layered or decoupled assembly 50 to 55 or higher, according to Building Science practitioner guidance.
Every 10-point increase in STC roughly halves the perceived loudness of transmitted sound, so moving from a basic 35-rated wall to a 45-rated insulated one is a meaningful, noticeable change, per the Gypsum Association’s sound control basics.
The catch is that lab-tested STC numbers assume perfect installation. Fastener bridging, unsealed perimeters, and back-to-back electrical boxes can quietly erase a chunk of the rated performance, which is why following the tested assembly details matters as much as choosing the right recipe.
What these projects actually cost and how long they take
Budgeting for a soundproofing retrofit depends on how far up the ladder you climb. As a general guide:
Mineral wool or fiberglass batts run a modest per-square-foot cost and are the cheapest line item in most projects.
Standard gypsum board is priced per sheet, with noise-rated or multi-layer panels carrying a noticeable premium over basic drywall.
A tube of green glue damping compound covers a limited area per tube, so larger rooms need several tubes.
Resilient channel or isolation clips add a per-linear-foot material cost on top of labor, since they require careful, slower installation.
A single room treated with sealing plus one new gypsum layer is typically a weekend DIY project. Adding resilient channel or a full double-stud rebuild usually means hiring out the framing and drywall work, since mistakes there undo the acoustic benefit. Room size, ceiling height, and the number of outlets, pipes, or vents in the wall all add time, since each penetration needs individual sealing and detailing.
Should you DIY this or call a contractor?
Match the scope of work to your own skill level before committing:
Sealing gaps, adding putty pads, and installing a single new gypsum layer are DIY-friendly for most homeowners with basic tools.
Resilient channel and isolation clip systems usually need a professional, since fasteners that touch both the channel and the stud behind it cancel out the decoupling benefit.
Double-stud or staggered-stud walls almost always require a contractor, given the framing changes and the coordination with electrical and HVAC work.
If you hire out the job, ask which tested assembly the contractor plans to install, how they prevent fasteners from bridging the resilient channel, and how they’ll seal the perimeter and penetrations. Ask to see examples of completed work and get a clear workmanship commitment in writing.
Treat vague answers as a red flag. A contractor who quotes an STC number with no reference to a specific tested assembly, or who won’t walk you through how they handle penetrations, is one to question further.
Notes from the field on staging a soundproofing project
Projects that go seal, then insulate, then add mass, then decouple only if needed tend to deliver the best return for the money spent, since each step is cheap to test before committing to the next. Thoughtful planning and attention to workmanship details, like sealed perimeters and correctly staggered joints, matter more to the final result than which specific panel brand gets used.
Homeowners who want to see finished interior work before deciding on a contractor can browse a project gallery for examples of how these details come together in a finished room.
— Vlad
Health and safety steps to take during the work
Fiberglass and mineral wool insulation both shed fine particles that irritate skin, eyes, and lungs, so wear gloves, safety glasses, and a dust mask or respirator rated for fine particulates whenever you’re cutting or stuffing batts into a cavity. Keep the work area ventilated, since cutting gypsum board also generates fine dust that lingers in still air.
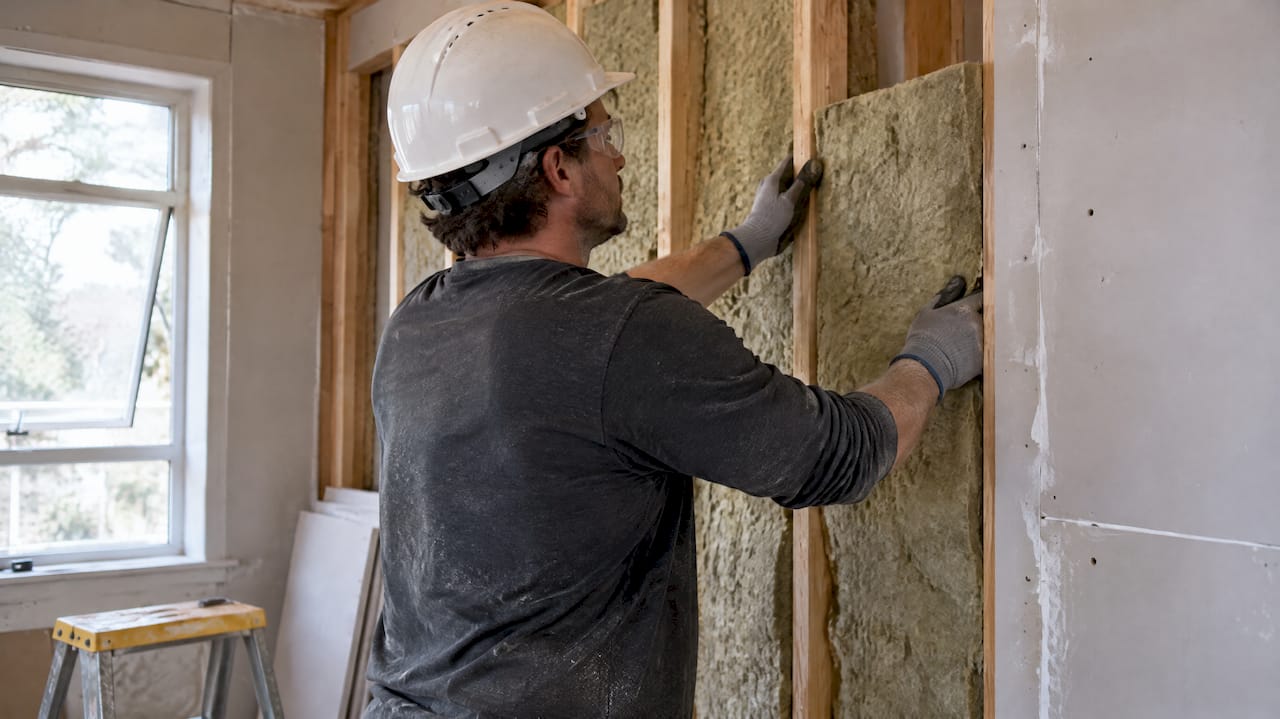
If your home was built before 1978, test for lead paint before cutting into any wall, and check for asbestos in older plaster, drywall joint compound, or vermiculite insulation before disturbing it. Both require specific handling and, in many cases, a licensed abatement professional rather than a DIY approach.
Watch for electrical and plumbing lines hidden inside the wall cavity before driving screws or cutting openings for putty pads and gaskets. A stud finder with wire and pipe detection reduces the risk of a costly, dangerous mistake. When working with damping compounds like green glue, check the product’s safety data sheet for ventilation requirements, since some adhesives release odors during curing.
Finally, if a retrofit calls for removing drywall, bracing framing, or working at height on a ladder near electrical fixtures, weigh whether the job has moved from a weekend task into territory better suited to a licensed professional. The combination of structural work, electrical proximity, and material hazards is exactly where a contractor’s experience pays for itself.
Why ductwork and vents can undo your soundproofing
A beautifully sealed and insulated wall can still leak sound if the HVAC system ties the two rooms together acoustically. Shared ducts, open returns, and registers placed directly across from each other on opposite sides of a wall act like a speaker tunnel, carrying both airborne noise and mechanical rumble from the furnace or air handler itself.
A few practical mitigations help without a full HVAC redesign. Line accessible duct sections with duct liner or wrap insulation to dampen the metal’s resonance. Install sound-rated grilles or baffled registers where ducts pass near bedrooms or home offices. Where two rooms share a return air path, a flexible duct section can interrupt some of the direct sound transfer that rigid metal ductwork carries efficiently.
Mechanical noise from the equipment itself, like a furnace blower or a noisy fan, is a separate issue from airborne room-to-room transmission, and usually needs a technician to address rather than wall treatments. If you’ve sealed and insulated a wall thoroughly but still hear sound through a vent, the register and duct run, not the wall, are the actual problem.
What the soundproofing industry gets wrong about quick fixes
The biggest myth in this space is that foam panels or peel-and-stick tiles marketed for “soundproofing” meaningfully block noise between rooms. Most of those products manage echo and reverberation inside a room, not transmission through a wall, and they’re often sold with STC-style language that implies a performance they don’t have.
The conventional advice also tends to jump straight to expensive assemblies, resilient channel, double-stud walls, specialty panels, without acknowledging that sealing gaps alone often produces a bigger perceived improvement than adding heavy materials to a leaky wall. A wall with a half-inch gap at the baseboard can undo most of what a second gypsum layer accomplishes.
If there’s one thing worth prioritizing, it’s diagnosing the problem correctly before spending money. Airborne chatter, footsteps, and HVAC rumble each need a different fix, and treating all three the same way is how homeowners end up with a partially solved, expensive problem instead of a fully solved, cheap one.
How Solution Team Remodeling approaches soundproofing retrofits
When sealing and a single drywall layer aren’t enough, it is important to handle the parts that are hardest to get right on your own: diagnosing the actual noise path, building a prioritized plan, and installing tested assemblies with properly sealed perimeters and staggered fasteners.

An estimate typically starts with a walkthrough of the affected rooms, a look at flanking paths like outlets and HVAC registers, and a clear recommendation on whether sealing and mass will solve it or decoupling is worth the added cost. From there, the work is scheduled around your home and finished with attention to trim and paint as with other remodeling projects. Visit our services overview to see the full range of installation work we handle, or reach out through our site to set up a walkthrough.
FAQ
How can I soundproof my existing internal walls?
Start by sealing every gap with acoustical sealant, especially at the top and bottom plates and around outlets, then fill the cavity with mineral wool or fiberglass if it’s accessible. Adding a new layer of gypsum board with a damping compound between layers typically delivers the next-biggest improvement without removing the existing wall.
How can I block noise from a shared wall?
Diagnose whether the noise is airborne voices or structural impact noise first, since the fixes differ. For airborne noise, seal gaps and add a mass layer; for impact noise from footsteps or plumbing, you likely need decoupling, such as resilient channel or isolation clips, which usually calls for a contractor.
How can I soundproof my walls without removing drywall?
Seal all visible gaps and penetrations, treat electrical outlets with acoustic putty pads, and add one new layer of noise-rated gypsum board directly over the existing drywall with green glue between the layers. This approach avoids demolition while still improving both airtightness and mass.
How can I soundproof my interior?
Work room by room, starting with the cheapest fixes: sealing, solid-core doors, and soft furnishings to reduce reflected sound. For rooms where noise is still a problem after sealing, cavity insulation plus an added mass layer usually closes most of the remaining gap, with full decoupling reserved for persistent low-frequency or impact noise.
Sources
The Basics of Acoustics and Sound Control - Gypsum Association
Building Science presentation by Tim Mattox (2025) on sound transmission
Recommended
Back to Blog
