bathroom-tile-patterns
10 Bathroom Tile Patterns, With Installer Rules for Small Baths
The patterns that cover most bathroom projects are grid, running bond, herringbone, chevron, basketweave, diagonal, and small-format hex or penny mosaics. As a rule of thumb, stick with grid or running bond for budget and simplicity, reach for herringbone or chevron when you want a focal statement, and choose small-format tile on shower floors for better traction.
TL;DR:
For tiles 15 inches or larger, use an offset of 33% or less to reduce visible lippage; request an onsite mockup before choosing 50%.
Small format mosaics suit shower floors because their grout joints improve traction and let the surface follow the required slope toward the drain.
Herringbone and chevron require more labor and create more waste than straight layouts, so reserve them for an accent wall or niche.
Check clearances around doors, toilets, and vanities, then lay out tile boxes on the actual floor to catch problems a sample board may not reveal.
For a small bathroom, continuing the floor tile into the shower and tiling one wall to the ceiling can make the space feel larger.
SolutionteamremodelingPlan a Bathroom That Works BetterSolution Team Remodeling brings thoughtful planning and skilled craftsmanship to bathroom remodels for homeowners in Redmond, WA.Explore remodeling services
Table of Contents
1. Popular Bathroom Tile Patterns and Where They Work Best
2. How to Choose a Tile Pattern for Your Bathroom
3. Installation Trade-Offs That Affect the Final Look
4. Small Bathroom and Shower Tactics That Make a Real Difference
5. Why a Professional Installer Matters for Pattern Results
Balancing Trend With Timeless Choices
Getting Started on Your Bathroom Tile Project
FAQ
Sources
1. Popular Bathroom Tile Patterns and Where They Work Best
Each pattern changes the mood of a bathroom and carries its own installation demands. Here’s a rundown of the layouts worth considering for your floors, walls, and shower.
Straight or grid layout: tiles line up in even rows and columns, works on nearly any tile size, and suits floors or walls where you want a clean, low-cost finish.
Running bond (brick): each row offsets by a fraction of the tile length, hides minor size variation, and remains the most common layout for subway tile walls.
Stacked subway: rectangular tiles stacked directly on top of each other without offset, giving a modern, graphic look on shower walls or backsplashes.
Herringbone: tiles set at right angles in a zigzag, best known on floors and accent walls, and reads as a premium upgrade even with inexpensive tile.
Chevron: similar to herringbone but with angled-cut ends that form a continuous V, a bolder and more labor-intensive version typically reserved for feature floors.
Diagonal or diamond: square tiles rotated 45 degrees, which can make a narrow bathroom floor feel wider and works well with grid-size tiles.
Basketweave: pairs of rectangular tiles alternate direction to mimic a woven texture, often used with small tiles on floors for a traditional feel.
Checkerboard: two contrasting colors alternate in a grid, a vintage favorite for floors that still shows up in bathroom tile design inspiration for retro and transitional styles.
Hex or penny mosaic: small-format tiles on a mesh sheet, ideal for shower floors because the dense grout lines improve slip resistance on small-format tile.
Large-format straight lay: oversized tiles (15 inches or more per side) laid in a simple grid to minimize grout lines and visually enlarge a small room.
Picking among these comes down to tile size, where the pattern lands in the room, and how much visual weight you want that surface to carry.
2. How to Choose a Tile Pattern for Your Bathroom
Matching a pattern to your space takes more than picking a photo you like. A few practical factors decide whether a layout will actually work in your bathroom.
Match tile size to room size: large-format tiles simplify a small floor, while mosaic or subway-size tiles handle curves and niches better.
Weigh labor and waste: herringbone and chevron typically add material waste and installer time compared to running bond or a straight grid layout.
Choose grout color deliberately: a matching grout blurs the pattern for a calmer look, while a contrasting grout sharpens the geometry, though wider joints mean more surface to clean.
Map the layout against fixture placement: account for toilet and vanity clearances before committing to a repeat pattern, so a bold layout doesn’t collide with a door swing or a sink cutout.
Pro Tip: Lay out a few boxes of tile on your actual floor before installation day. Seeing the real pattern at scale catches problems a sample board never shows.
3. Installation Trade-Offs That Affect the Final Look
The pattern looks good on paper, but a few technical details determine whether it looks good on the wall.
For large-format tile (15 inches or longer per side), trade guidance recommends an offset of 33 percent or less rather than the traditional 50 percent brick joint, since manufacturing warpage on bigger tiles can create visible lippage at a half offset.
If you want the classic 50 percent brick look with large-format tile anyway, ask your installer for an onsite mockup first, so you can see and approve the lippage trade-off before the crew sets the whole floor.
Shower pans need consistent slope toward the drain, and small-format tiles make that easier to achieve because their many grout joints flex across the slope instead of relying on one rigid plane.
Grout joint width should scale with tile size and edge finish: rectified tiles with crisp edges can take a narrower joint, while handmade or textured tile usually needs a wider joint to hide natural variation.
Waterproofing goes underneath all of this. A walk-in shower needs a correctly sloped substrate and sealed membrane before any tile goes down, regardless of which pattern sits on top.
4. Small Bathroom and Shower Tactics That Make a Real Difference
A handful of layout choices do more to open up a small bathroom than any single pattern.
Run the same floor tile continuously from the bathroom into the shower to remove the visual break a curb or threshold creates.
Tile floor-to-ceiling on at least one wall, which draws the eye up and makes the room feel taller.
Choose a frameless glass enclosure and a wall-mounted vanity so more floor stays visible.
Consider a curbless shower entry where the budget allows, since removing the step reads as more space even in a tight footprint.
Use hex or penny tile on the shower floor specifically, since the small format gives you traction and an easier slope than a single large tile.
5. Why a Professional Installer Matters for Pattern Results
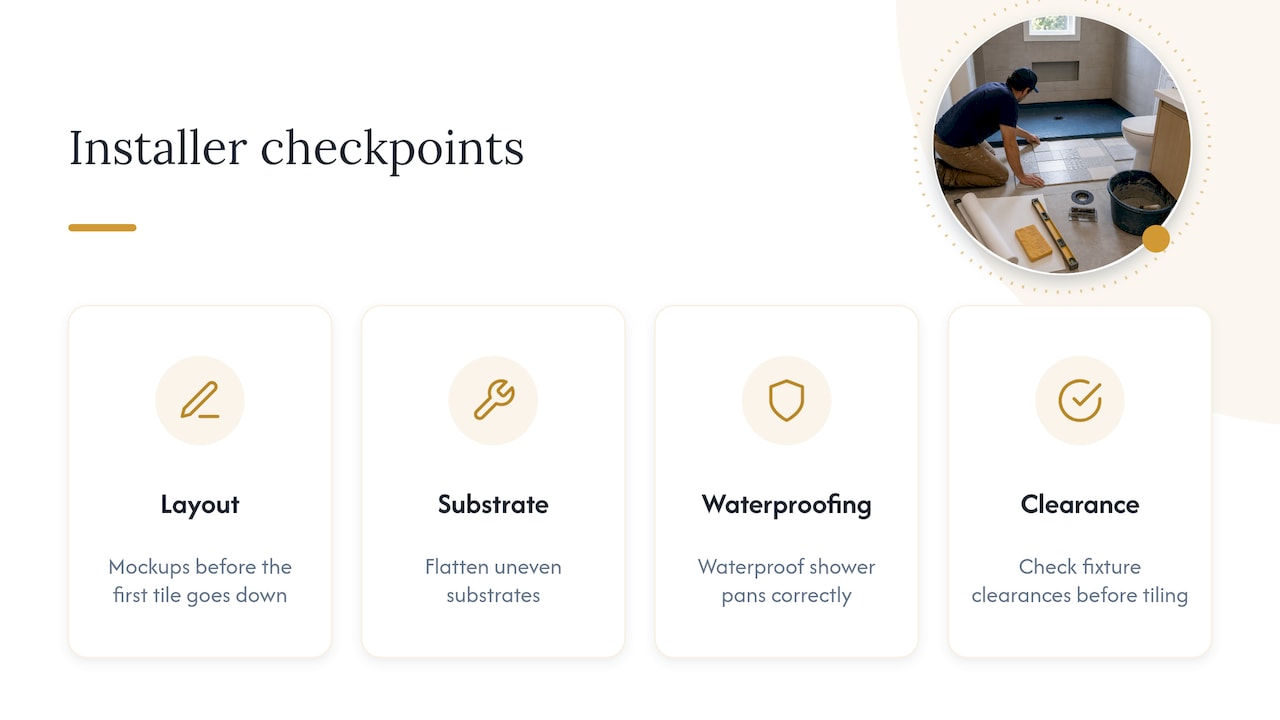
A sharp pattern on paper can fall apart without accurate layout and substrate prep. We handle tile installation in Redmond, WA with a planning process that includes mockups, flattening uneven substrates, waterproofing shower pans correctly, and checking fixture clearances before the first tile goes down. You can review completed layouts in our renovation portfolio, and if your project also touches drywall or paint, sequencing those trades correctly around tile work makes a real difference, a point Wendell Barco Plastering’s prep guide covers well.
Balancing Trend With Timeless Choices
Bold patterns date faster than neutral ones. We’d rather see herringbone or chevron used as an accent wall or niche than spread across an entire bathroom, paired with a quiet primary tile that keeps resale value intact.
— Vlad
Getting Started on Your Bathroom Tile Project
Choosing a pattern is only half the job. Getting it installed with the right offsets, slope, and waterproofing is what makes it last.
Bring inspiration photos and a rough room plan to your consultation so we can talk through sizing and layout options together.
Browse our services page for the full list of flooring and remodeling work we handle alongside tile.
If you’re planning a full bathroom remodel rather than a tile swap, our bathroom remodeling team can walk you through layout, materials, and scheduling from the first conversation. Reach out to set up a consultation and see how your pattern idea fits into the bigger plan.
FAQ
What is the most popular tile pattern?
Running bond, also called brick pattern, remains the most common layout for bathroom walls because it hides minor tile size variation and works with nearly any rectangular tile. Herringbone has become a popular choice for statement floors when homeowners want a more dramatic look.
What is the 3/4/5 rule for tiling?
The 3/4/5 rule is a method for checking that a corner is square during layout, using a triangle with sides of 3, 4, and 5 units (or any multiple of them) where the two shorter sides meet at a right angle. Installers use it before setting the first tile to make sure a pattern starts straight rather than drifting out of square across the room.
What is the current trend for bathroom tiles?
Current trends favor grid and running bond layouts for everyday simplicity alongside herringbone, chevron, and basketweave for feature areas, with small-format hex or penny tile used on shower floors for traction. Large-format tile laid in a simple straight pattern is also popular for making small bathrooms feel bigger.
What are the best bathroom tile designs?
The best design depends on the room: grid or running bond for cost-conscious floors and walls, herringbone or chevron for an accent wall or shower niche, and small-format mosaic for shower floors where slip resistance matters. Pairing a neutral primary tile with one patterned feature area tends to age better than covering the whole room in a bold layout.
Sources
Recommended
Back to Blog
